Getting started
Download the build for your machine, clear the one-time first-launch warning, plug in a device and read your first scan.
On this page
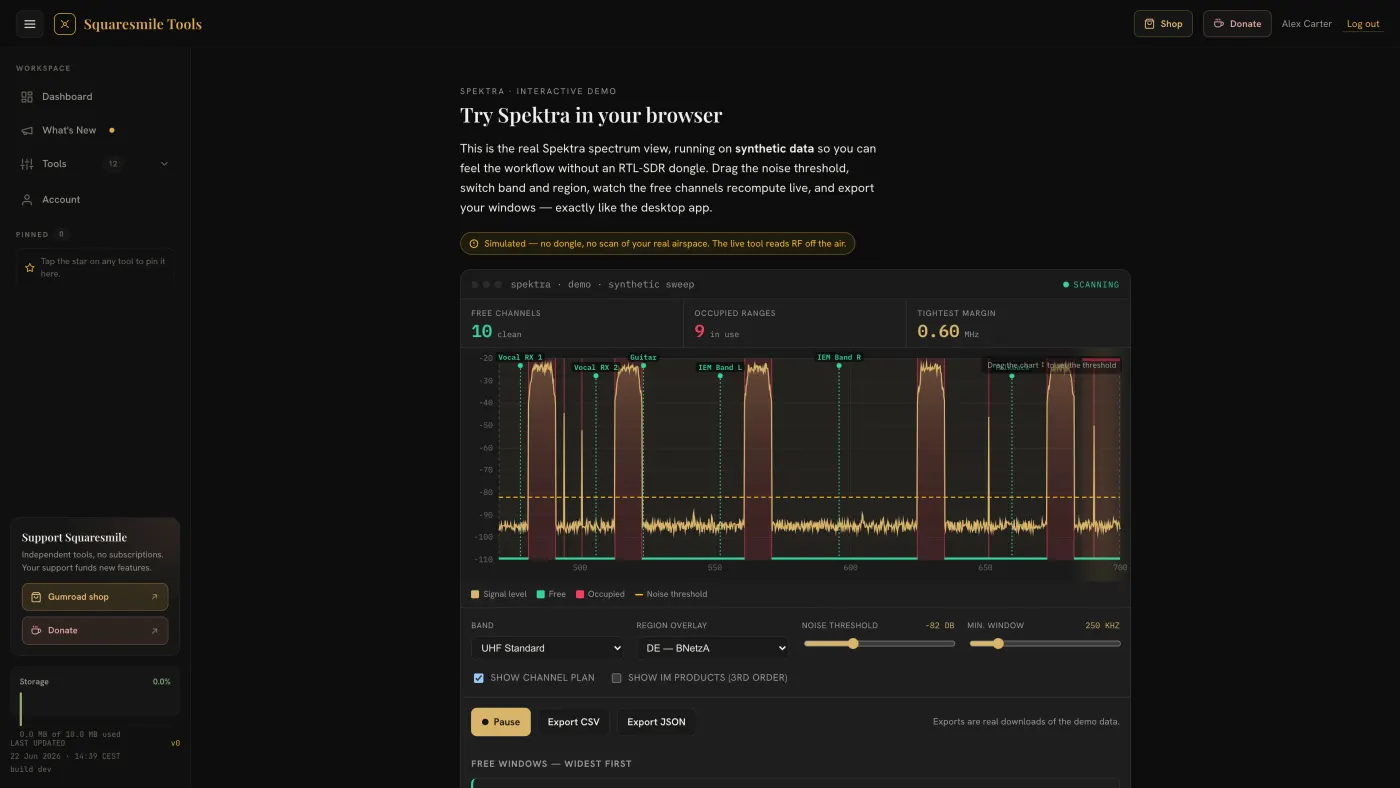
Spektra RF does not run in a browser tab. The platform holds your licence and serves the download; the app runs locally on your Mac or PC. Five minutes from here to your first coordinated frequency.
1. Download and install
Buy Spektra RF on Gumroad (€49, one-time) and activate the key on your
Squaresmile account — that unlocks the download. Signed in, open Spektra RF
from the dashboard: without a licence you land on the Activate license
page, where you paste the key. Your email must be verified first. New to the
platform? The claim page at /claim/spektra-rf creates the account and
redeems the key in one step. See Licences and paid tools.
Then pick the file for your machine on the Spektra RF page:
| Your computer | File |
|---|---|
| Mac with Apple Silicon (M1, M2, M3, M4) | Spektra RF_<version>_aarch64.dmg |
| Mac with an Intel chip | Spektra RF_<version>_x64.dmg |
| Windows 10 or 11 (64-bit) | Spektra RF_<version>_x64-setup.exe (or the .msi) |
Not sure which Mac you have? Apple menu → About This Mac. "Apple M…" means Apple Silicon; "Intel Core" means Intel.
macOS: open the .dmg, drag Spektra RF onto the Applications folder,
eject the disk image.
Windows: run the installer, then start Spektra RF from the Start Menu.
Nothing else gets installed. The device drivers and support libraries for every supported device ship inside the app. You do not install Python, and you do not open a terminal to use it.
2. First launch
Spektra RF is not signed with an Apple Developer ID or a Windows code-signing certificate yet, so both systems warn you once.
macOS refuses to open the app the first time. Either of these clears it, once:
-
Open System Settings → Privacy & Security, scroll down to Security, click Open Anyway, confirm. Then open Spektra RF again.
-
Or paste this into Terminal, press Return, and open the app normally:
xattr -dr com.apple.quarantine "/Applications/Spektra RF.app"
Windows shows a SmartScreen warning when you run the installer. Click
More info → Run anyway. If you want to check the download first, its
SHA-256 hash is published next to the installer in SHA256SUMS.txt.
The first launch takes a little longer than the rest. On an older Intel Mac it can be 30–40 seconds. A splash screen shows while the scanner engine starts.
3. Plug in your device
Connect your RTL-SDR, tinySA, RF Explorer, HackRF or Airspy before you start the app. Spektra RF detects it automatically; there is nothing to select.
If you plug it in later, click Re-check device in the amber banner at the top. The app tries again without restarting.
Windows, first time with an RTL-SDR: Windows gives the dongle a TV-tuner
driver by default, which no SDR software can use. Open "Spektra RF -
Install RTL-SDR Driver" from the Start Menu. It launches Zadig, which ships
inside the installer. In Zadig choose Options → List All Devices, pick
your dongle (usually RTL2838UHIDIR or Bulk-In, Interface (Interface 0)),
make sure the target driver reads WinUSB, then click Replace Driver.
Unplug the dongle, plug it back in and click Re-check device. You do this
once per USB port.
4. Your first scan
Click Start scan or press Space. The default sweep covers 470–700 MHz, the wireless-mic band, and a full pass takes a few seconds. Leave it running; each sweep redraws the spectrum.
No device connected? You still get a spectrum. Spektra RF drops into demo mode with a synthetic signal that includes plausible TV transmitters, mic carriers and the LTE edge. The amber banner "Demo mode — synthetic spectrum, no supported device detected" tells you it is not real. No banner means real hardware.
5. Reading the spectrum
- The bright trace is the current sweep; the faint one behind it is the previous sweep.
- The dashed horizontal line is the noise threshold. Anything above it counts as occupied.
- Coloured fills mark what is above the threshold. Once you have registered your own equipment they mean three different things: green is one of your own carriers, amber is something else sitting on a channel you use, red is an unknown signal.
- The Free channels and Occupied ranges cards under the spectrum list the same information as numbers, sorted, ready to read out over a headset.
Type a frequency in MHz into the lookup field to get a free / occupied verdict for that exact spot.
6. Change the language
The interface is available in English, German, French, Spanish, Italian, Dutch and Portuguese. Pick one from the language menu in Settings. The choice is remembered for next launch.
Next
- Turn a scan into usable windows: Find a free frequency window.
- Register the gear you actually carry: Register your equipment.
- Let the Advisor build the whole plan: Coordinate a show with the Frequency Advisor.
Thanks for the feedback.